Microsoft is ending support for Windows 10 in just two days time. What this means is, if you’re using Windows 10 and don’t take action, you’ll no longer get security updates for your computer. And that would be bad – your computer is therefore at greater risk of viruses and malware.
Previously, when Microsoft ended support for Windows, if you were a home user then you were on your own. This time, Microsoft is offering the Extended Security Updates programme, and making it available to home users for the first time. I suppose this is because Windows 11 installs only exceeded Windows 10 as recently as June this year, and around 45% of Windows users still use Windows 10 despite it being 10 years old now. This includes us.
Upgrade or replace
Ideally, Microsoft wants you to upgrade to Windows 11. Many Windows 10 computers can be upgraded, but not all. If not, then, as far as Microsoft is concerned, you should be considering purchasing a new computer.
At home, we have a Lenovo Ideapad 320S which is approaching its eighth birthday. That’s pretty old for a laptop, and it’s been used heavily as it was my main work computer during lockdown. Theoretically, it might run Windows 11, if I backed everything up, wiped its SSD and did a fresh install. But Microsoft’s PC Health Check app won’t allow an in-place upgrade, as its processor (an Intel Core i3 in the 7000 series) doesn’t meet its minimum hardware requirements.
We will, eventually, replace this with a new laptop running Windows 11 – probably some time next year. But for now, this little survivor meets our needs – especially as, back in 2021, I upgraded its RAM from 4 gigabytes to 16 gigabytes.
Enrolling for Extended Security Updates
If you open Windows Update on a Windows 10 machine, you should see the option to enrol for Extended Security Updates. This gives you an additional year of security updates, to allow you time to either upgrade or buy a new computer. As mentioned, this is a new offering for home users; previously, only enterprise users ever had this option.
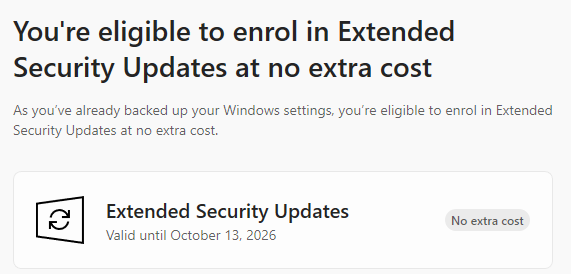
Enrolling for extended security updates may cost you, depending on your system settings. If, at the time you sign up, you’re already synchronising your PC settings, then you may be offered the extended security updates at no charge. This is what happened to us, as per the screenshot at the top of this blog post. Which was nice.
Alternatively, if you live in the European Economic Area (EEA), then you should also get the updates for free. Thanks to Brexit, us Brits unfortunately no longer live in the EEA.
If you’re not eligible for free updates, then Microsoft will charge you. If you use Microsoft Rewards, then you can redeem 1000 reward points instead of paying money. Alternatively, there’s a $30 charge, which works out at about £24 for the year.
What about Linux?
If you don’t want to buy a new PC, aren’t eligible for free updates and don’t want to pay, then I suppose the other option is to consider running some flavour of Linux on your existing PC. I wouldn’t necessarily recommend this, but if you’re really stuck for money and have the time to learn how to use a new operating system, then sure, I guess it’s an option to consider.
