Mounting a USB hard drive on startup on Ubuntu Core

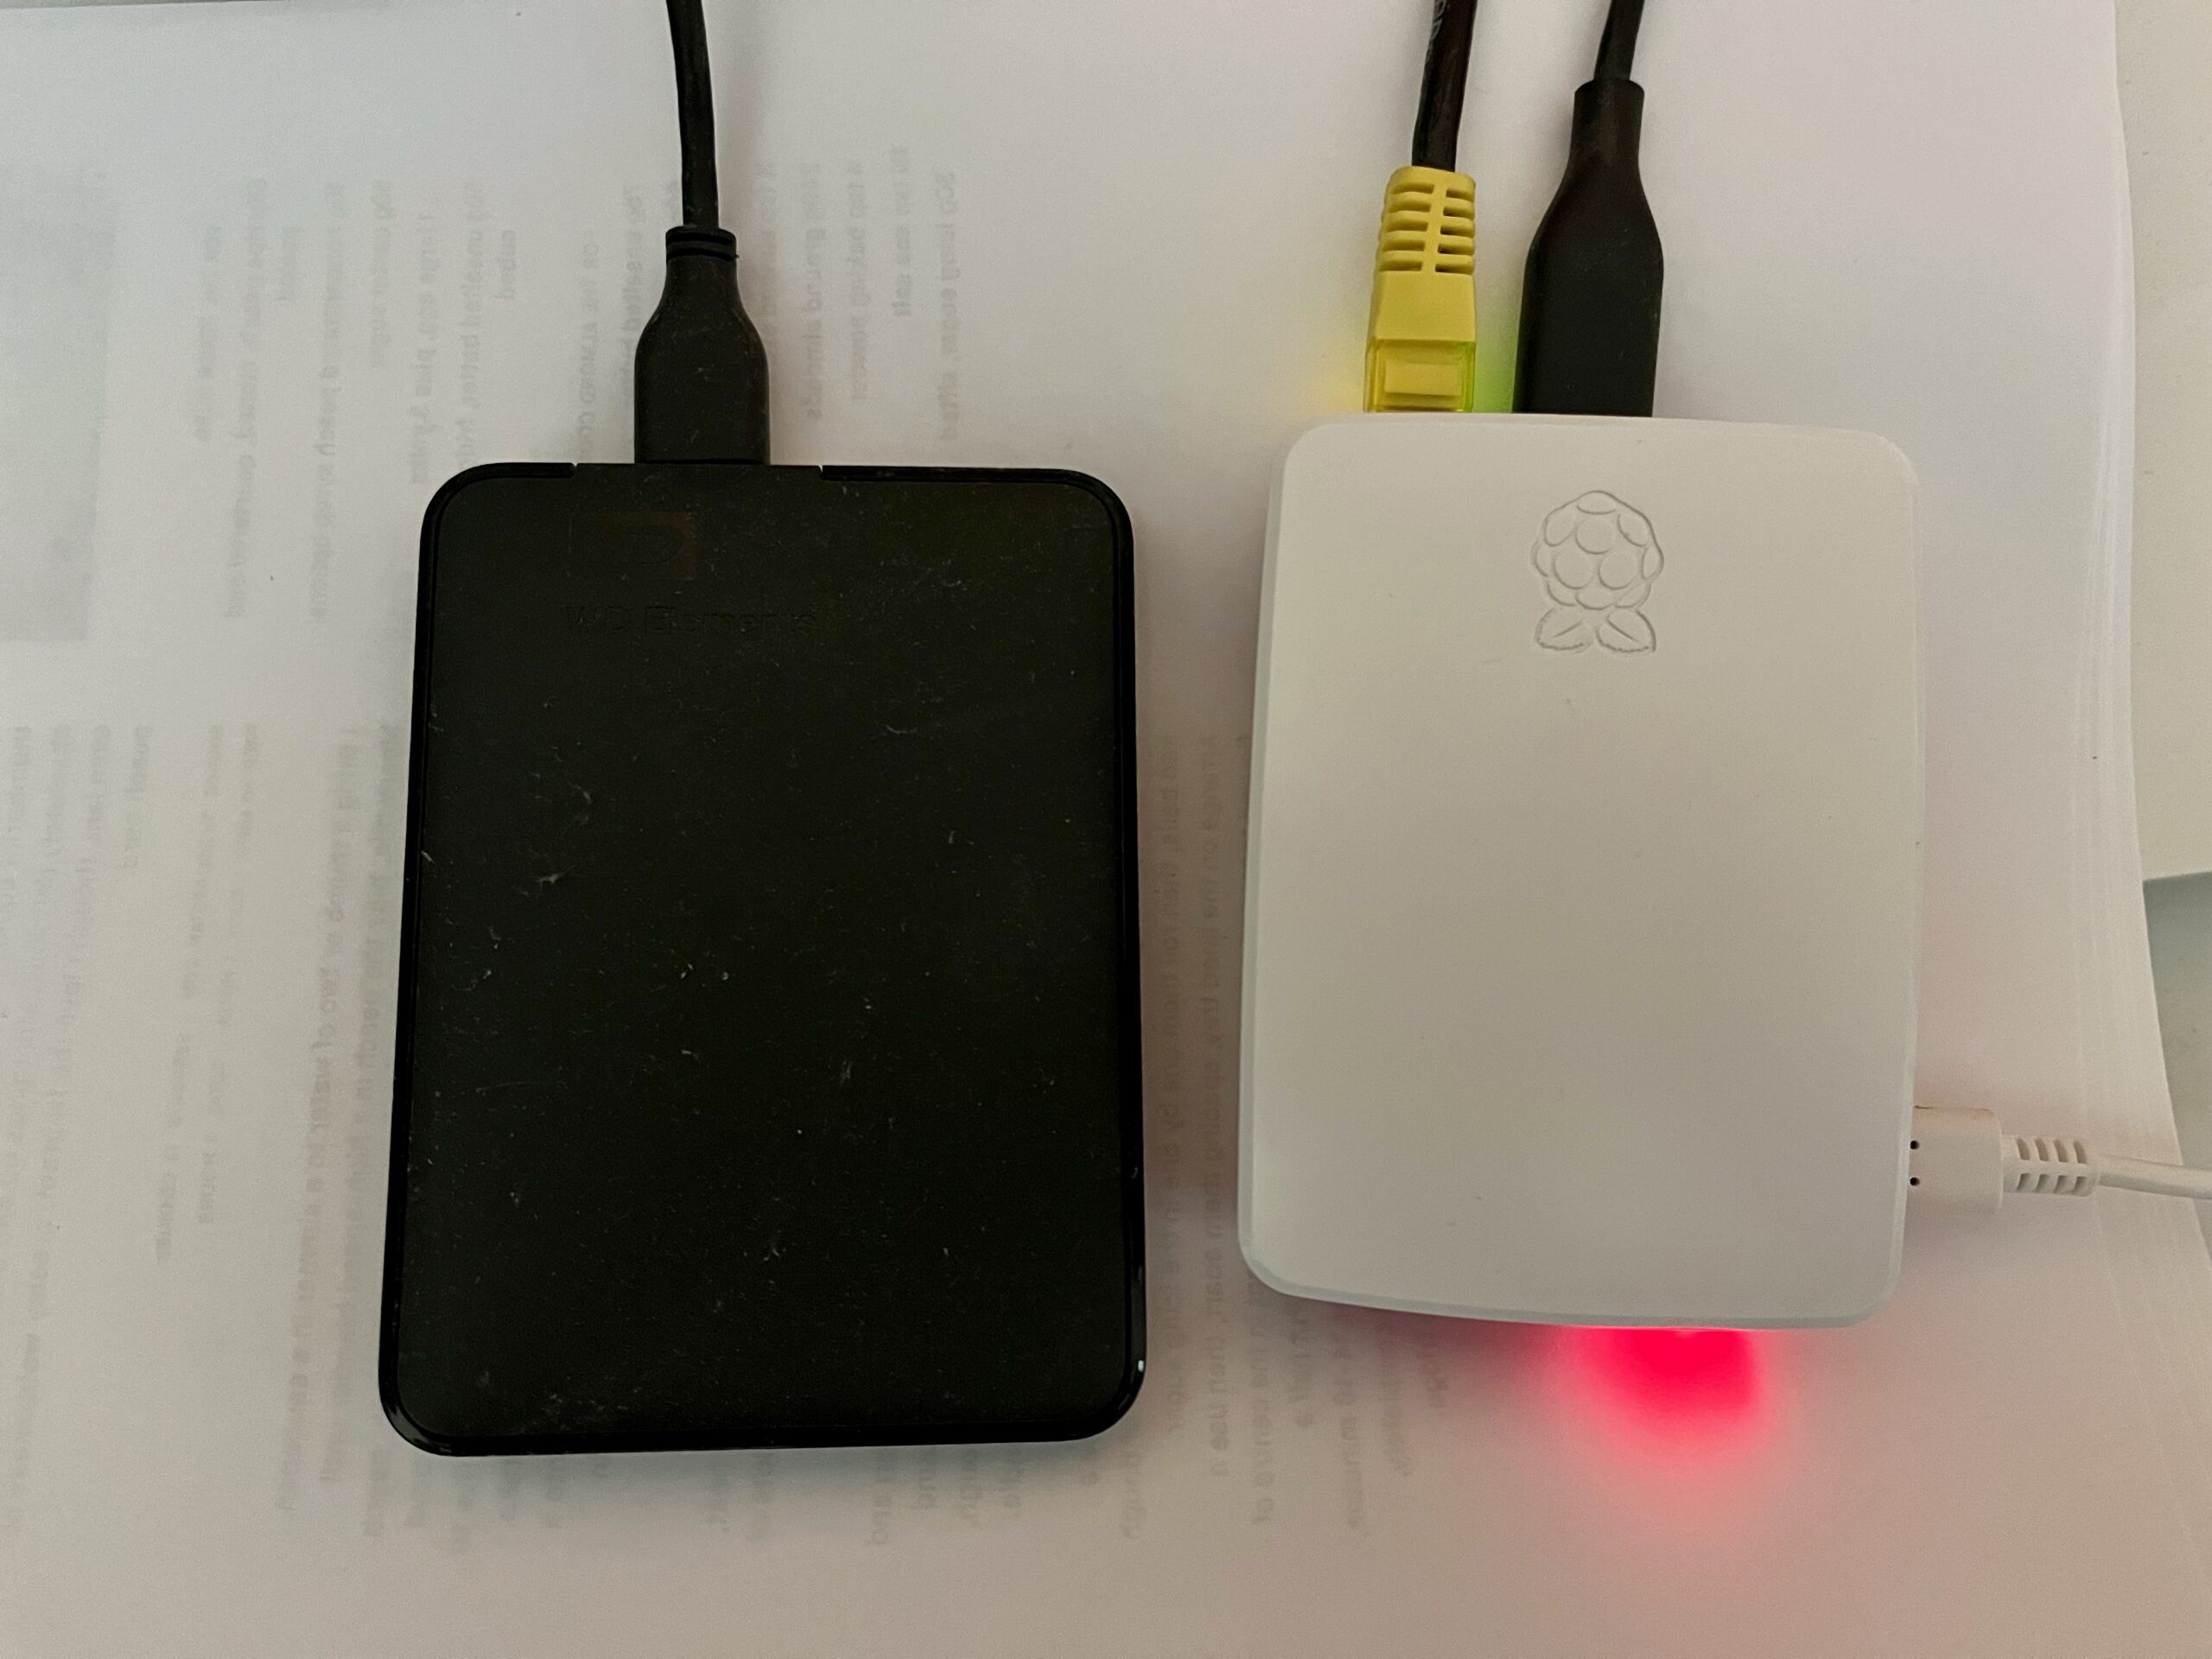
A photo of a Raspberry Pi 4 connected to a USB external hard drive

As you’ll be aware from my regular posts about it, I have a Raspberry Pi 4 running Ubuntu Core, which acts as a server for Home Assistant, Plex and Calibre-Web. Here’s how I’ve set it up to mount an external USB hard drive on boot up.

As it’s a Raspberry Pi, the operating system and binaries set on a microSD card, which in this case is a mere 16 GB. Whilst the me of 20 years ago would have been astounded at the concept of something so tiny holding so much data, 16 GB isn’t much nowadays. So, I have a 1 TB external USB hard drive for storing the media files for Plex and Calibre-Web.

Ubuntu Core doesn’t automatically mount USB storage devices on startup unless you tell it to, and the instructions for doing so are different when compared with a regular Linux distro.

There’s no fstab

Most Linux distros, including regular Ubuntu, include fstab for managing file systems and mounting devices. But Ubuntu Core is designed to be a lightweight distro to act as firmware for Internet of Things devices, and so it doesn’t include many tools that are common in other Linux distros. fstab is one such tool which is missing.

You can, of course, just mount a USB drive manually with the following:

sudo mkdir /media/data
sudo mount /dev/sda1 /media/data

But this won’t persist when the computer restarts. After a bit of searching, I found a solution on StackExchange; it’s for Ubuntu Core 16, but works on 22 as well.

How to tell systemd to mount your USB hard drive

It should go without saying that you should back up your system before doing any of this. If you make a mistake and systemd stops working, your device could become unbootable.

Firstly, you’ll need to run sudo blkid to list all of the file systems that Ubuntu Core can see. Find the one that starts with ‘/dev/sda1’ and make a note of the long hexadecimal string that comes after UUID – it’ll probably look something like ‘2435ba65-f000-234244ac’. Copy and save this, as this identifies your USB hard drive.

Next, you’ll need to create a text file. Ubuntu Core only seems to offer the Vi text editor, which I haven’t bothered to learn to use properly. My favoured text editor is nano, but it’s not available on Ubuntu Core. Therefore, my recommendation is to create a file on another device and FTP it across. The file should be called media-data.mount; it’s really important the file name matches the intended mount point. For example, if you’re instead planning to mount the USB hard drive to /mnt/files, this text file would need to be called mnt-files.mount.

Here’s the template for the file:

[Unit]
Description=Mount unit for data

[Mount]
What=/dev/disk/by-uuid/[Your UUID]
Where=/media/data
Type=ext4

[Install]
WantedBy=multi-user.target

You’ll need to paste in the UUID for your USB hard drive where it says ‘[Your UUID]’. You’ll also need to match the file system type; I have my external USB hard drive formatted as ext4 for maximum compatibility with Linux, but yours may use ExFAT or NTFS.

This file needs to be saved to /etc/systemd/system/media-data.mount . You can either use vi to create and save this file directly or FTP it across and copy it over.

There are three further commands to run in turn:

sudo systemctl daemon-reload
sudo systemctl start media-data.mount
sudo systemctl enable media-data.mount

If you’ve done this correctly, then the next time you restart your device, your USB hard drive should mount automatically. If not, then you should receive some surprisingly helpful error messages explaining what you’ve done wrong.

There’s another guide at Wimpy’s World which has some additional detail and helped me get this working.

How to: fix wrong location on iPhone

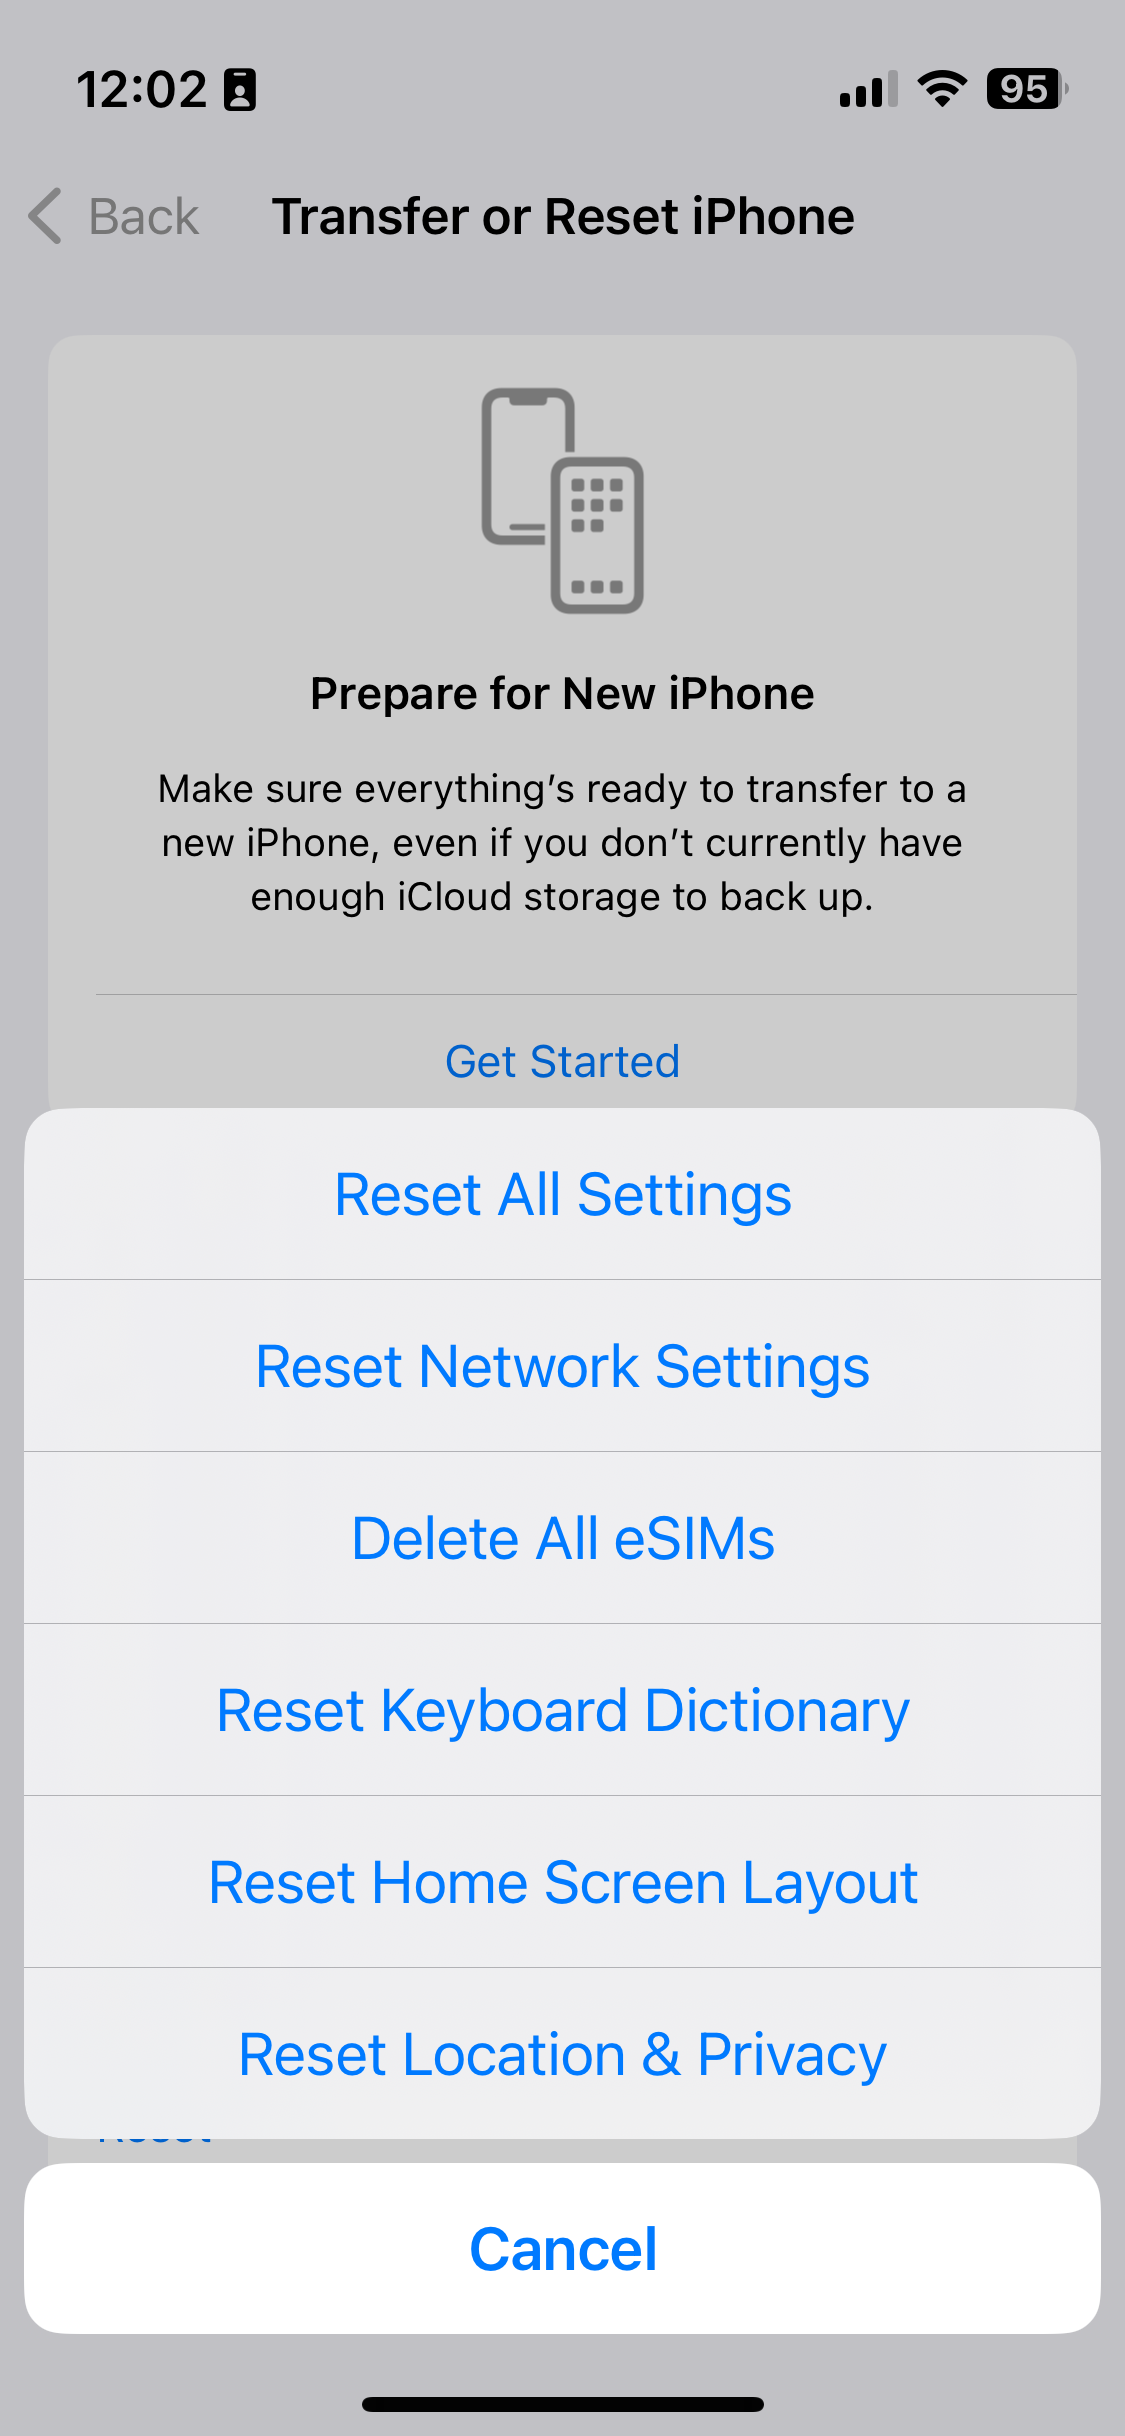
A screenshot showing how to reset settings on iOS 16

Over the Christmas break, my iPhone would randomly decide that I was in my office. I’d have an app open that used my location, but instead of showing me where I actually was, it’d suggest that I was in Bradford. Which isn’t so useful when, in reality, you’re at home, or in York.

It caused particular problems when using Google Maps for directions, as it’d randomly jump to Bradford and then back again. Swarm was basically unusable. And it completely broke the ‘Track Exercise’ function of the Fitbit app. I had to actually uninstall and reinstall the Fitbit app a couple of times because it wouldn’t let me stop the exercise. This was even after restarting the app.

Turning Wifi off helped. Apple’s iPhones, and indeed many other devices, use the SSIDs of available Wifi networks to approximate your location. This is done by querying a web service, which means that you can still get an approximate location even when indoors, and out of view of GPS satellites. But turning off Wifi was hardly a long term solution.

How to actually fix the location problem

A bit of Googling uncovered this article about fixing your location. It offers several solutions, depending on whether the issue affects just one application, or all. In my case, it was all applications, and the solution that worked was the fifth on the list. This involves resetting your phone’s location and privacy settings.

To do this, open Settings, and choose General. Then, scroll right down to the bottom and choose Reset, then select ‘Reset Location & Privacy’ – on iOS 10.2, this is the last option. Your device will ask you for your unlock password – pop this in, confirm, and hopefully your device will get the location correct from now on.

There is a drawback to doing this, however. You’ll have noted that this resets both your location and privacy settings. This means that any apps that you have granted access to your contacts, photos, calendars, camera, microphone, media library and so on will need to request them again. Although, oddly, apps will retain their location permissions, along with any permissions regarding background app refresh, notifications or mobile data access.

Despite these issues, it was a relief to fix the problem.

This blog post was updated in November 2023 with an updated screenshot, but the instructions are broadly the same.

How to: get cheaper car insurance

Alas, the car I've bought insurance for is not this Rolls Royce

Having bought a car at the weekend, I also needed to arrange car insurance. The law in Britain now requires all cars that are used on public roads to have a valid insurance policy; if you don’t, then you must park the car off-road and submit a SORN. If your car is found on a public road, parked or moving, then you can be fined. So I needed to have a policy in place before I would be able to drive the car away.

Like many things, buying car insurance can be simple and quick, but if you’re prepared to put some effort in, you can bring your premiums down significantly. I can wholeheartedly recommend the advice on MoneySavingExpert.com which gives some tips on how to reduce your premiums by tweaking the information you provide. I would advise you to read the whole article, but here are the things I tried that worked for me.

1. Trying multiple price comparison web sites

It’s hard to avoid the various price comparison web sites that advertise nowadays. Whether it’s the one with the meerkats, talking robots or annoying opera singer, these sites are well-advertised. They work by taking your details, and obtaining quotes from a range of insurers on your behalf, which are then ranked to show you the cheapest. The sites make their money from the referral fees that insurers pay when you take up a policy. Considering how much these sites advertise, they must make a lot of money from these referral fees.

It’s worth trying multiple sites, as different sites work with different insurers. I got different results from each. You can also usually get cashback if you click through to a price comparison web site from a cashback site like Quidco (referral link) or Topcashback (referral link). I got about £2 from them, just for getting a quote.

2. Go direct to insurance companies

Once I’d found the cheapest insurer – and the three comparison sites I tried all gave the same company – I also tried to get a cheaper quote by visiting their site directly. Again, going via a cashback site may net you cashback as well. Remember those referral fees? Cashback sites pay those to you.

It’s also worth checking Aviva and Direct Line, who do not advertise their policies on price comparison web sites. As it happens, both gave me unaffordable quotes that were nearly double the cheapest that I could find, but, worth a try.

3. Tweak your job description

I have a rather unique job title of ‘Student Recruitment and Data Officer’, which isn’t on the selection lists that insurers ask for. Originally I put it through as ‘Recruitment Consultant’ working in state education, but I found changing it to ‘Administrative Officer’ in the university sector lowered my premiums significantly (by about 20% in my case). As long as the title still accurately reflects your job role, you should be fine.

4. Add another driver

As Christine hasn’t passed her test yet, it was going to just be me on the car’s insurance policy. However, we found that adding another family member to the policy, as a secondary driver, reduced my quote by another 10%. To be effective, this must be someone that would realistically be likely to drive the car, and who has a good driving record with no penalty points or recent insurance claims. Adding an irresponsible or inexperienced second driver may increase premiums, but it’s worth trying.

5. Include some business use

If you think adding another driver is a bizarre way to reduce your premiums, here’s one that seemed even weirder. I will need to drive for work from time to time (I reckoned no more than 1000 miles per year) and so I included this in the policy. This means that I won’t need to arrange a hire car, so my employer also saves money too. After getting quotes with this included, I tried taking it out and stating that the car would only be for ‘leisure’ use (no commuting and no work-related activities). That actually pushed the premiums up by about 10%, so I put it back in.

Plus the things that I didn’t try

I didn’t try everything. I could have got an even cheaper policy if I had opted in to a ‘black box’ insurance policy. This involves the fitting of a recording device to your car that monitors your location and how you drive – and if you drive safely, you’ll save money. InsureTheBox is one of the better known firms that offers this (a friend works for them), but it’s available from a variety of insurers.

Sometimes, opting for third-party insurance can be cheaper, but it covers less than fully comprehensive insurance which could leave you out of pocket in the event of an accident. And, again bizarrely, sometimes comprehensive cover is cheaper than third-party because of risk factors.

And if you have another type of policy with an insurance firm (say home or travel insurance), some insurers may give you a discount if you take out more than one policy from the same firm. Our home insurance was arranged via a broker when we got our mortgage so I wasn’t able to approach them for a car insurance quote on this occasion.

In the end

As it happened, the cheapest quote I got was via Confused.com, for Diamond insurance – a company that historically only covered female drivers. Both are owned by Admiral Group, incidentally. Overall, the policy ended up being about £200/year cheaper than when I started, which isn’t bad for a couple of hours spent entering information into various web sites. Insurance for new drivers is always expensive and I’m hoping that, should I continue to drive like Captain Slow, my premiums should come down in future years.

Fixing high memory usage caused by mds

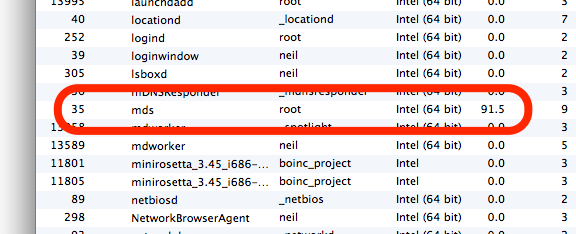
Screenshot of activity monitor on Mac OS X showing mds with high memory usafe

Recently my Mac Mini has been running very slowly, with some programs freezing for as much as several minutes. I pruned the list of items that were running on startup but this didn’t seem to make much difference.

So I opened Activity Monitor (the OS X equivalent of Task Manager) and found a process called ‘mds’ was consuming huge amounts of RAM and virtual memory. MDS is the process which builds an index of your disks for use by Spotlight, the tool that lets you search your drives, and also by Time Machine for backups. Sometimes MDS requires a fair amount of RAM, but it was using almost 2 gigabytes of virtual memory and almost a gigabyte of RAM in my case. I only have 4 gigabytes of RAM in total, and so this was causing major problems as OS X had to regularly swap data between RAM and the paging file.

I’d tried looking into this before and got nowhere. Most of the results in Google were discussions on Apple’s support forums, which were devoid of any real solutions. But eventually I found this post on iCan’t Internet which actually had a solution.

Firstly you should run Disk Utility. Repair your hard disk, and also repair the disk permissions. This may fix your problem, but it didn’t in my case so I moved on to the next step.

Open up Terminal, and type in the following command: sudo mdutil -avE . This runs a tool called ‘mdutil’, and tells it to completely rebuild Spotlight’s index. It turns out that the index on my hard disk had got corrupted somehow, and this was causing problems with the ‘mds’ process. It took a while for the command to run, but afterwards a huge amount of RAM and virtual memory became free. Unsurprisingly, my Mac ran much more happily after this.

Hopefully if you’ve have the same problem this will help. It has certainly breathed new life into my increasingly sluggish computer.

How to do London without spending too much money

South Bank

Though Christine and I are not badly off financially, we’re still in a situation where we really want to save money where possible, and this includes holidays. Despite this, we went to London a few weeks ago for a long weekend, which is probably one of the most expensive cities in the world. But it doesn’t have to cost the earth and I’m going to go through some of the things we did, or could have done, to keep costs down.

1. Don’t stay in a hotel in Central London

As a general rule, the closer you are to central London, the more expensive your hotel will be. Go a little further afield and you will find some good value hotels, many of which are close to Tube stations. And you’ll probably find that the money saved by going for a cheaper hotel further out of London is more than the cost of travelling into central London on the Tube. The only disadvantage is the extra travelling time to get out there, so it’s harder to drop by your hotel room on an evening before going out, for example.

2. Consider a budget hotel

Whilst it’s nice to stay in hotel that offers everything, sometimes all you need is a bed for the night. I’ve stayed in a couple of good budget hotels – Holiday Inn Express at Royal Docks and Premier Inn at Collier’s Wood – both of which were very good value. if you don’t mind sharing a room, a hostel may be even cheaper.

3. Skip hotel meals

Budget hotels often unbundle meals from the price – this makes the headline price of the room cheaper, but means you may be paying as much as £8 per person, per day for breakfast. If you don’t need an all you can eat breakfast every day, skip it – you’ll be able to get something cheaper from a supermarket or a café. You can even save time by eating it on the Tube on your way in to London, if you’re staying in the suburbs.

4. Get an Oyster card

If you’re following my advice and staying outside central London, you’re likely to be using public transport a lot. An Oyster card will not only save you money, but will also mean you won’t need to have change for bus or Tube fares. Fares are as much as 50% cheaper with an Oyster card than without, and fares are capped at the price of a one-day travelcard, so if you do lots of journeys you won’t end up paying a fortune. Say you’re staying in a hotel near a Tube station in zone 3,and travel in and around central London a lot on one day during off-peak hours – you will not pay more than £7.30 that day, regardless of how may tube journeys you do in zones 1-3. Because it’s a top-up card, you just need to top it up at a machine each time the balance gets low (and they take cards). You can pick them up from major Tube stations for around £5, which includes £2 of credit, or order them online; unused credit doesn’t expire and you can register the card online to protect your balance in case the card is lost. It’s accepted on all Tube trains, plus all buses and mainline rail services within London zones 1-9.

5. Don’t go to restaurants on main streets

Restaurants in more prestigious locations will be more expensive. Go a little off the beaten track and you can find some nice places that don’t cost too much. TripAdvisor is your friend here, as are local guidebooks or recommendations. If necessary, stick with a chain restaurant that you know, like Pizza Hut or Nando’s – it’s your call whether you want something cheap and familiar or want to push the boat out a bit.

6. Look for special deals and vouchers

I often mention Money Saving Expert and there’s a good reason for it – the site is huge and is full of really good, impartial advice about saving money in all aspects of life, and this includes going out and holidays. You may find that some attractions will offer you two tickets for the price of one, simply by printing a voucher off their web site, or a restaurant will allow your kids to eat free, and Money Saving Expert gathers many of these in its Deals section. Also, have a look at sites like Groupon, Living Social and Keynoir for deals in London, which may include cheap accommodation, reduced price restaurant meals or cheaper entry into attractions, although be aware that they usually ask you to pay up front for a voucher so make sure you use it so you don’t waste money.

7. Visit free attractions

London is home to quite a few national collections like the Natural History Museum and the Science Museum, which are both free, enough to fill a full day and great for people of all ages, including kids. But there are also plenty of other free attractions and once again Money Saving Expert has a list of some of them. Of course, if you don’t want to spend any money you can just walk around and see the sights, eschewing the sometimes expensive open top sightseeing buses.

8. Consider buying a London Pass

If you’re spending a few days in London, and want to visit a number of attractions that charge for entry, you may wish to consider buying a London Pass. The price varies depending on how long you want it for, starting at £44 per person for a one day pass to £95 per person for a 6 day pass, which at £15.83 per day isn’t too expensive. Again, you’re paying up front, so unless you’re sure you’ll visit enough attractions for it to be worth it, don’t get it.

9. Book in advance

This applies not just to your travel and accommodation – some attractions offer a discount if you book ahead. Usually it’s only a modest 10%, but everything helps. If you’re going to London by train, remember that the cheapest tickets tend to be released around 3 months in advance, so order them at least 2 months in advance to get the best deal. Avoid sites like thetrainline, who charge a booking fee, and go directly to one of the train operators – it doesn’t necessarily have to be the one you are travelling with. See my Buying rail tickets guide for more details. Similarly some budget hotels have room sales with some very cheap rooms available if you’re quick enough to blag them.

10. Use the bus, or walk

The Tube is popular with visitors to London as it’s easy to follow, with each line having its own name and colour, and Tube stations are plentiful and located in useful places. But it’s not the only way to get around. London also has plenty of buses, and with an Oyster card, a single bus fare is only £1.30; and, like with Tube fares, they’re capped at £4 per day – this compares favourably with the Tube where a single fare in zone 1 is £1.90 with Oyster, rising to £2.90 if you’re travelling from zones 1-3. Also, because buses are above ground, they’re sometimes quicker than the Tube as you don’t need to spend as long as 5 minutes walking from the street to the platform, and they stop at more places. Use TfL’s Journey Planner to work out if there’s a bus you can catch. Alternatively, it may be quicker to walk, and there’s a handy map showing where walking between Tube stations would be quicker than actually taking the Tube (although the map is from five years ago so is a little out of date – it doesn’t include the Overground).

If you want more information, as well as the aforementioned web sites have a look at Money Saving London and London for Free for some ideas for free or cheap things to do.

How to migrate a Parallels virtual machine to VirtualBox

A screenshot of the web site for VirtualBox

Despite Parallels and VirtualBox both being programs which run virtual machines on Mac OS X, they both use different file formats for storing the virtual machines on disk. Though I believe Parallels will open a VirtualBox disk, VirtualBox cannot automatically import Parallels disks. But it’s not impossible…

If the guest operating system, i.e. the system that is running inside Parallels, is Windows 2000/XP/Vista, then it is possible to use a free tool from VMWare to do the conversion. Here’s a step-by-step:

1. Back up your virtual machine

Seriously. We’ll need to modify it a bit before it’s converted, so you’ll want a backup copy just in case things go wrong, or if you may use Parallels again in future.

2. Uninstall Parallels Tools

This is the modifying bit. Load your Windows virtual machine in Parallels, and uninstall Parallels Tools (the helper program that adds drivers and clipboard sharing, and other stuff). This is important as otherwise your virtual machine won’t boot in VirtualBox – and I know this from experience. You also can’t uninstall Parallels Tools unless you are running Parallels at the time.

3. Close all programs

Close as many running programs in your virtual machine as possible. We’re about to take a snapshot image of it while it is running, so any unsaved data may be lost when you boot the image in VirtualBox. That includes programs with icons in your notification area, such as virus scanners, instant messaging programs etc.

4. Install VMWare Converter

Once Parallels Tools has been uninstalled (you may need to reboot the virtual machine for this), we can begin the conversion process using a tool ironically made by VMWare. Go to the download page for the VMWare Converter in whatever web browser you use in your virtual machine (it’s a Windows program) Download it, and then install it.

Run the Converter tool, and click ‘Convert Machine’ – this should pop up a wizard which walks you through the process of setting up a new virtual machine image. You want to tell it to use a ‘Physical Computer’, and then on the next screen choose ‘This Local Machine’. Select the hard disk of the virtual machine and leave ‘Ignore page file and hibernation file’ ticked as this will just bloat the new virtual disk with unnecessary rubbish.

For the type of virtual machine, select ‘Other virtual machine’, and on the next screen, give it a name (e.g. ‘Windows Vista’). Next, you will also need to save it somewhere, and this should not be the existing hard disk of the virtual machine. You can either use your Mac’s main hard disk, mapped to drive ‘Z:’ under Parallels, a network drive or an external drive if you have it forwarded through to the virtual machine. You should be able to use the top option for the type (i.e. ‘Workstation 6.x’) but if it doesn’t work try another option. Keep ‘Allow disk to expand’ checked on the next screen. Click through until you’re ready to complete, and start the conversion.

5. Go and grab a cup of coffee

Or go out shopping. Or read a few chapters of War and Peace. Either way, the machine will take a significant amount of time to convert – mine took around 45 minutes and was only around 15 GB. Bigger disks may well take longer. It helps if you don’t have lots of other programs running on your Mac at the same time as then more of your CPU juice can be used for the conversion.

6. Shut down the machine in Parallels

Now that you’ve exported the machine, shut down Windows and close Parallels. This is mostly so that you can stay within the terms of the license agreement for Windows which won’t allow multiple instances.

7. Import the disk into VirtualBox

Open VirtualBox, choose ‘File’ and then ‘Virtual Disk Manager’. Add the disk file that you created, and click OK. Then click ‘New’ to create a new virtual machine, and select the correct operating system from the list. Try to ensure that you give the virtual machine the same settings (such as RAM size) as you did in Parallels. When asked for a hard disk, click the ‘Existing’ button and choose the disk file that you created from the list. Then click Finish.

8. Boot up in VirtualBox

Hopefully all will have gone to plan, and you will be able to boot into Windows as before. All of your files and programs should be there waiting for you.

If, however, you encounter a blue screen mentioning ‘prlfs.sys’ like I did, boot the machine but press F8 during the boot to enter Safe Mode with Command Prompt. Type in cd c:\windows\system32\drivers and then rename prlfs.sys prlfs.sys.old and then reboot – that should get you up and running.

For the inquisitive, prlfs.sys is part of Parallels Tools and this should have been removed as part of step 2, however muggins here forgot to this when he tried it himself and therefore encountered this error.

9. Install VirtualBox Guest Additions

Guest Additions are to VirtualBox what Parallels Tools are to Parallels – in other words, they make Windows sit better in the virtual machine and improve integration with the host operating system. On the main VirtualBox menu, select Devices and then ‘Install Guest Additions’ and follow the on-screen instructions. Though this is optional, it will improve the experience of using Windows in VirtualBox.

Hopefully now you’ll be up and running in VirtualBox. Feel free to post comments below and I’ll try to do what I can to answer them but I’m not the world’s greatest expert in this. I also don’t know how to do this in other versions of Windows or other operating systems.

Create a Safely Remove Hardware shortcut

A screenshot of a Safely Remove Hardware shortcut on Windows desktop.

Here’s a tip I gleamed from today’s Windows Secrets newsletter. You may well be familiar with the ‘Safely Remove Hardware’ icon which appears in your notification area (or ‘system tray’ if you must) when you plug in a removable hard drive or camera (or whatever). You may also notice that the icon sometimes isn’t there – and this is a problem which my parents’ computer randomly suffers from – which means it’s difficult to safely disconnect removable devices. The answer: a desktop shortcut.

Right-click on the desktop, select ‘New’ and then ‘Shortcut’. For the item location, copy and paste the following:

RunDll32.exe shell32.dll,Control_RunDLL HotPlug.dll

Then click ‘Next’. Call the shortcut ‘Safely Remove Hardware’, and you should be done. If you want to make it look snazzier, right-click the icon, choose ‘Properties’ and then the ‘Shortcut’ tab, click on ‘Change Icon’ and in the ‘Look for icons’ box type:

%windir%\system32\HotPlug.dll

The first icon in this file matches the ‘Safely Remove Hardware’ icon so you’ll be able to recognise it more easily.

Now, if the normal notification icon doesn’t appear, all you need do is double-click your new desktop icon to safely remove any disks before unplugging them.

Update (November 2023): This was written back in April 2007, but it still seems to work in Windows 10.

Screenshots on a PocketPC

Since it took me a while to find out how to do this myself, I’m going to use this opportunity to tell you how to take screenshots on a PocketPC or Windows Mobile device – in my case, Windows Mobile 2003.

First of all, you need to know that, as far as I can tell, your device does not have a screenshot capability built in. It’s not like a Windows machine where you can hit Print Screen or a Mac where you can hit Cmd+Shift+3 – you will have to install some software first. I’m sure there’s some fancy-pants shareware jobby that will do the job painlessly but in this instance we’re going to use Pocket SnapIt (link no longer available), which is available for both normal Windows Mobile/PocketPC devices and Windows Smartphone handsets. There’s also a Windows version for your PC. It’s free and open source.

Choose the relevant package – for my Dell Axim x50v, I chose the PocketPC package – and download it to your device. This may mean downloading it to the Mobile Device folder in My Computer and then using ActiveSync to send it across. Then, click on the cabinet file on your device to have it install. If you’re using Windows Mobile 2003 (and probably 5.0 also) you’ll probably get a warning saying that the application was designed for an older operating system – you can ignore this. Now, go to Programs and run the newly-added Pocket SnapIt icon.

You’ll now need to define a hotkey to trigger the taking of screenshots. I chose the ‘/’ character – to set this, click on Menu and select Options. Then click Menu again, expand Options and choose Capture Options. Now click Menu a third time and click Select Capture Button. Click OK and then select a key on the keyboard. Click OK to go back to the main screen, and then click Start.

Now, open up the program you want to take a screenshot of and press the trigger key – you should hear a noise when you do. You should then find a bitmap file in your My Documents folder call Snap001.bmp – this is your screenshot.

You can see my effort further up the page – this was a shot from Skype for PocketPC. As you can see, the capturing mostly works but it chokes on the font smoothing, so you may want to consider turning this off first. You’ll also need to change the image format to something other than bitmap if you want to post your screenshot on the internet (since bitmaps are not compressed) – PNG is probably the best format to go for. The image I posted is less than 13KB.